Share project work with clients
Choose exactly which projects, tasks, comments and files your clients see in their portal.
You decide what a client sees of your work. A project only appears in their portal when you share it, and inside it they only see the tasks, comments and files you choose.
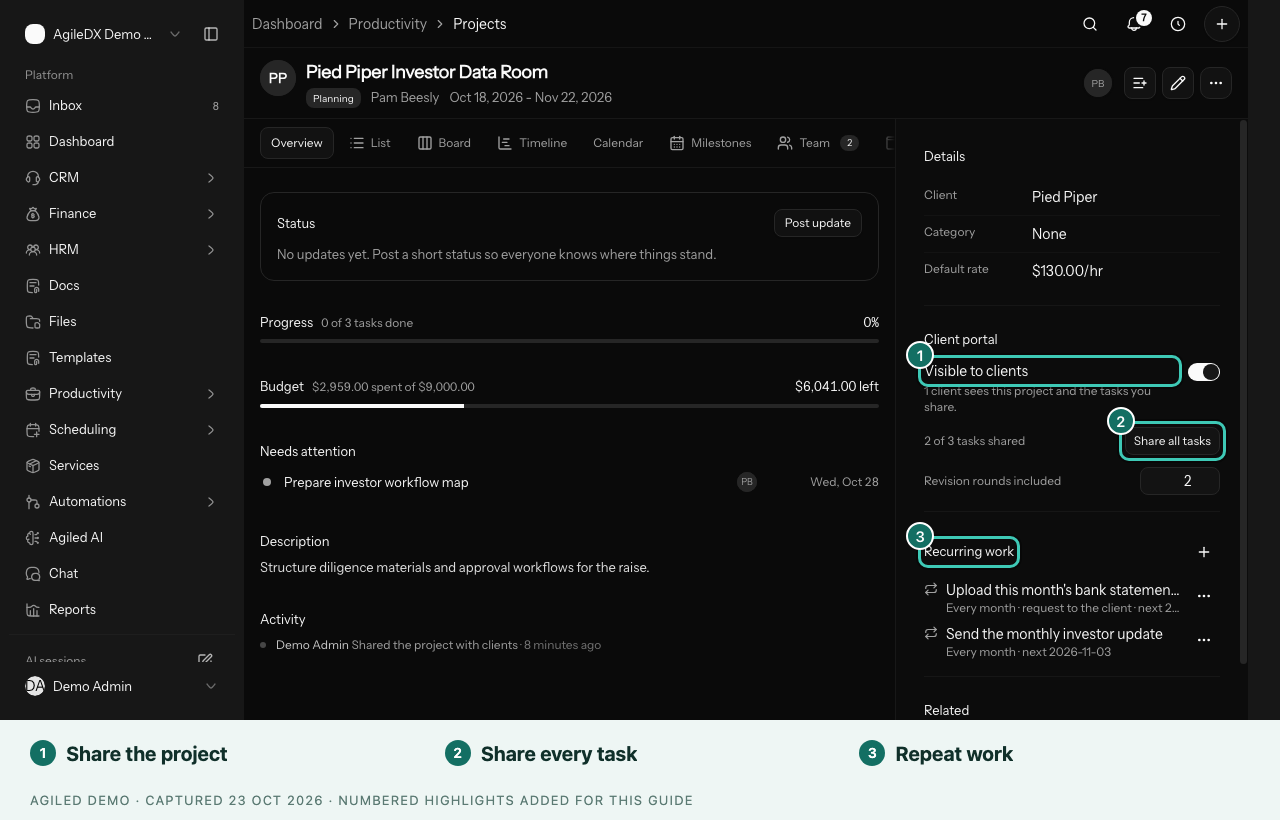
Before you start
The client needs portal access and must be on the project: open the project's Team tab, select Add member and choose the contact under Clients.
Share the project and its tasks
- Open the project's Overview tab.
- In the Details panel, under Client portal, turn on Visible to clients.
- Select Share all tasks, or share tasks one by one: open a task's full page (Open full view from the drawer) and turn on Visible to client in its Client portal panel.
You're done when the panel shows how many tasks are shared, for example "2 of 3 tasks shared". New tasks start as internal, so nothing reaches a client by accident.
Choose which files clients see
On the project's Files tab, each file has a button:
- Clients see this: the client can preview and download it in their portal. Images, PDFs and text files open without downloading.
- Team only: the file is hidden from the portal.
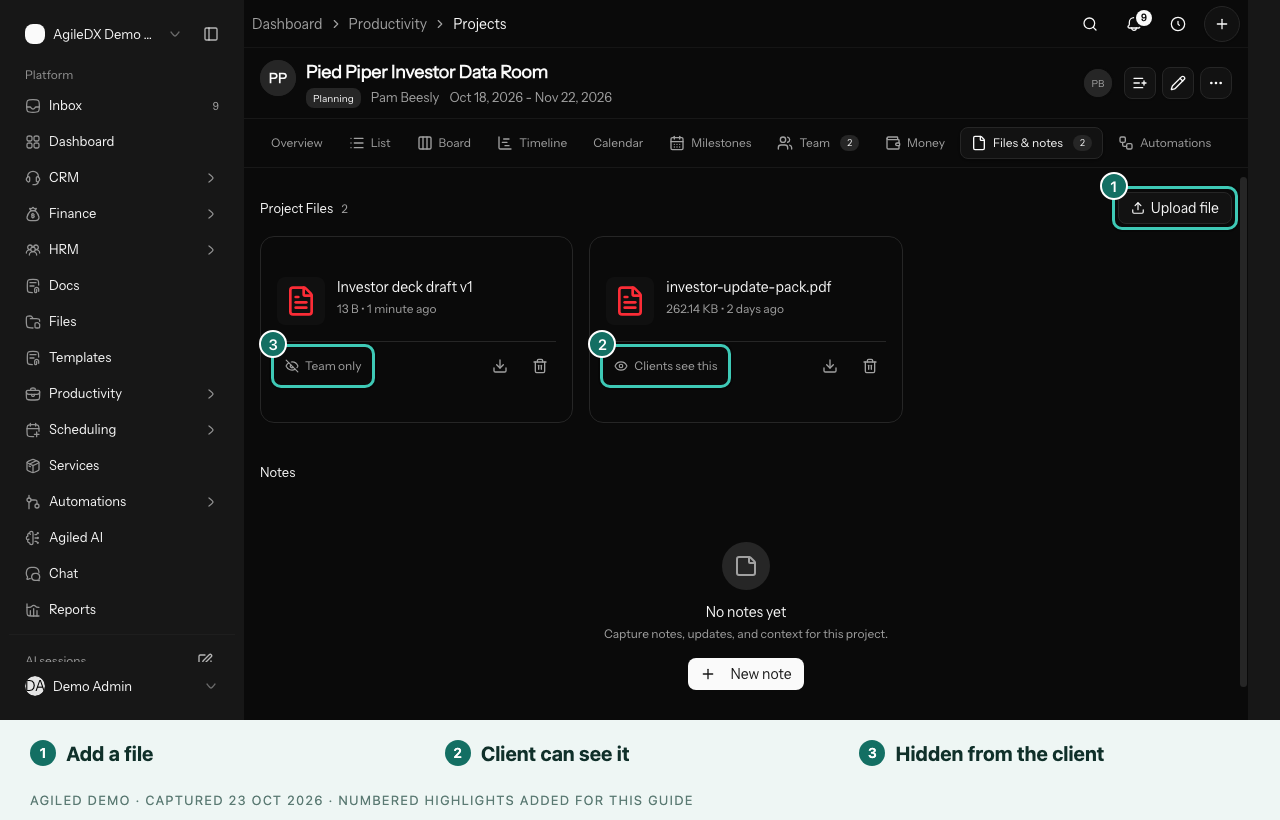
Select the button to switch it. Files start as Clients see this. Use Upload file on the same tab to add files; files attached to a single task aren't covered by this button.
Comments
On a task the client can see, the comment box switches between Visible to client and Internal only. Choose before you post. Client-visible comments are marked Client can see for your team. Comments the client writes are always visible to both sides.
Good to know
- Budgets, spend and rates are never shown to clients.
- Turning a task off also hides its subtasks. Turn Visible to clients off to hide the whole project again.
- Every sharing change appears in the project's activity, for example "Hid Brand guide.pdf from clients".
- Client contacts don't appear in assignee, timesheet or workload pickers.