Workflow Builder
Build and save automations.
The workflow builder is where you configure the trigger and actions that make up an automation.
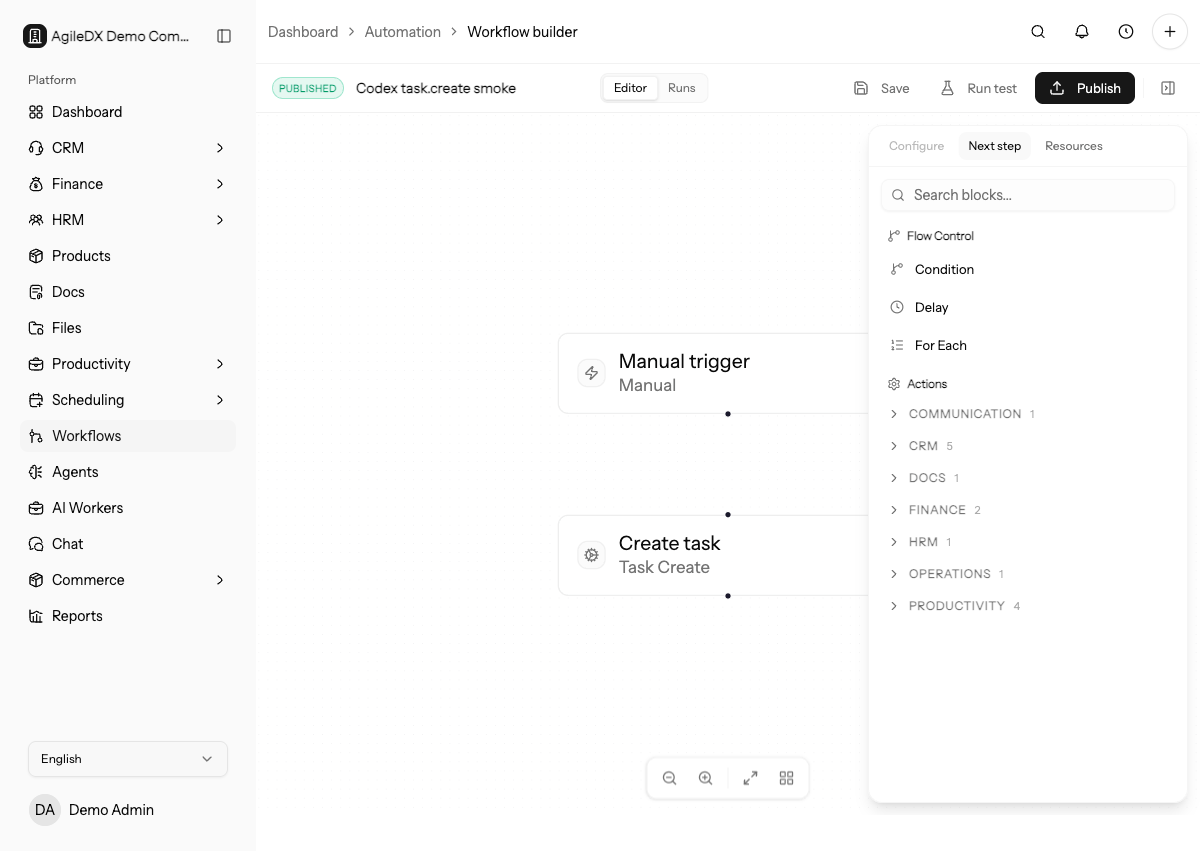
The builder has three main areas: the canvas, the node configuration panel, and side panels for adding nodes, viewing resources, and running simulation.
Build Safely
Start with a simple workflow, test it on safe records, then add more actions only when the basic flow works.
Pause or keep the workflow unpublished while you are changing triggers, delays, conditions, or actions that can affect customers, finance records, or shared tasks.
Builder Workflow
- Add or configure one trigger.
- Add one action or flow-control step.
- Select each node and complete required configuration fields.
- Use the resources panel to confirm available records.
- Save the workflow.
- Simulate the expected path.
- Publish only after a safe test run works.
Flow-control nodes include conditions, delays, and For Each loops. Action nodes are schema-driven, so available fields depend on the selected action and the records available earlier in the workflow.
Configure Nodes
Select each node on the canvas and complete the required fields in the configuration panel. Use clear names for steps when the workflow has multiple branches. A readable canvas is easier to debug from run history.
For conditions, confirm the field, operator, and comparison value. For delays, confirm the unit and whether the delay should happen before or after another action. For loops, confirm the list being iterated is the list you expect.
Use step names that describe the business action, such as Create onboarding task or Notify finance owner. Generic names make run history harder to
understand after a failure.
Save and Test
After saving, trigger the workflow with known test data and review the run history. Do not rely on a workflow for important customer or finance work until the run history proves it behaves as expected.
Use simulation to check the expected path before publishing, then run one real test with safe data. Simulation helps catch configuration gaps; real test runs confirm permissions, records, and side effects.
Configuration Warnings
Fix warnings before publishing. Warnings often mean a required field is missing, a saved value no longer matches the action schema, a condition operator was remapped, or a flow-control node has invalid values.
Change Management
When editing an active workflow, note what changed and why. Review recent runs after publishing the change so you can catch unexpected branches, duplicate actions, or skipped steps early.
For high-impact workflows, duplicate or rebuild a draft version first, test it, then replace the active workflow when the new version is proven.
Before changing a workflow that sends customer messages, creates finance records, or updates integrations, pause or schedule the change during a quiet period. Then review the first live run immediately after publishing.
Troubleshooting
If a workflow does not trigger, confirm the workflow is published, the trigger matches the event, and the source record belongs to the expected workspace.
If an action fails, open the run detail and check the node error, required fields, permissions, and whether the referenced record still exists.
If a branch takes the wrong path, inspect the condition values from the run history and compare them with the source record.